- What is Composting?
- Getting Started: Supplies
- Layering the Bin
- Primary Phase vs. Secondary Phase
- Monitoring the Bin
- Troubleshooting
What is Composting?

Composting is an age-old practice that has been adapted as a means of daily animal mortality disposal and can be beneficial for the environment.
- Composting is a natural process that generates a value-added end product and takes place under aerobic (requiring oxygen) and thermophilic (high temperature) conditions.
- The process is achieved by providing the right mixture of carbon, nitrogen, air and water to encourage microbial growth.
- A carbon to nitrogen ratio (C:N) of 25:1 to 40:1 is necessary to maintain an efficient compost pile. Moisture content of 40 to 60 percent should be maintained throughout the pile.
- Bin composting is the simplest form of container composting and the method most suitable for daily poultry mortality disposal.
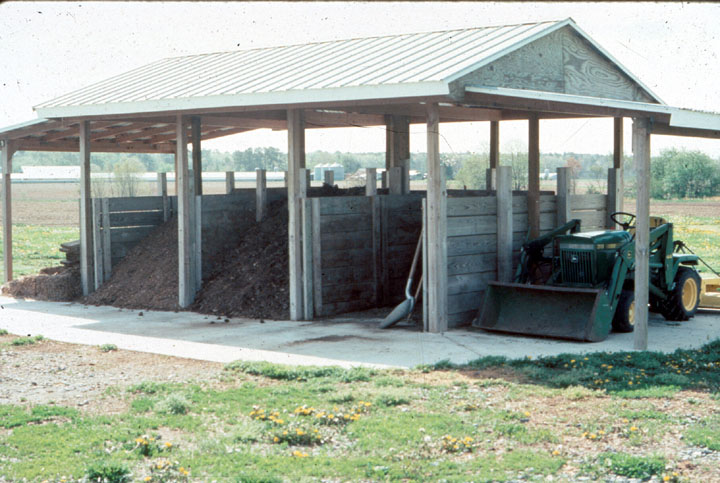
Getting Started: Supplies
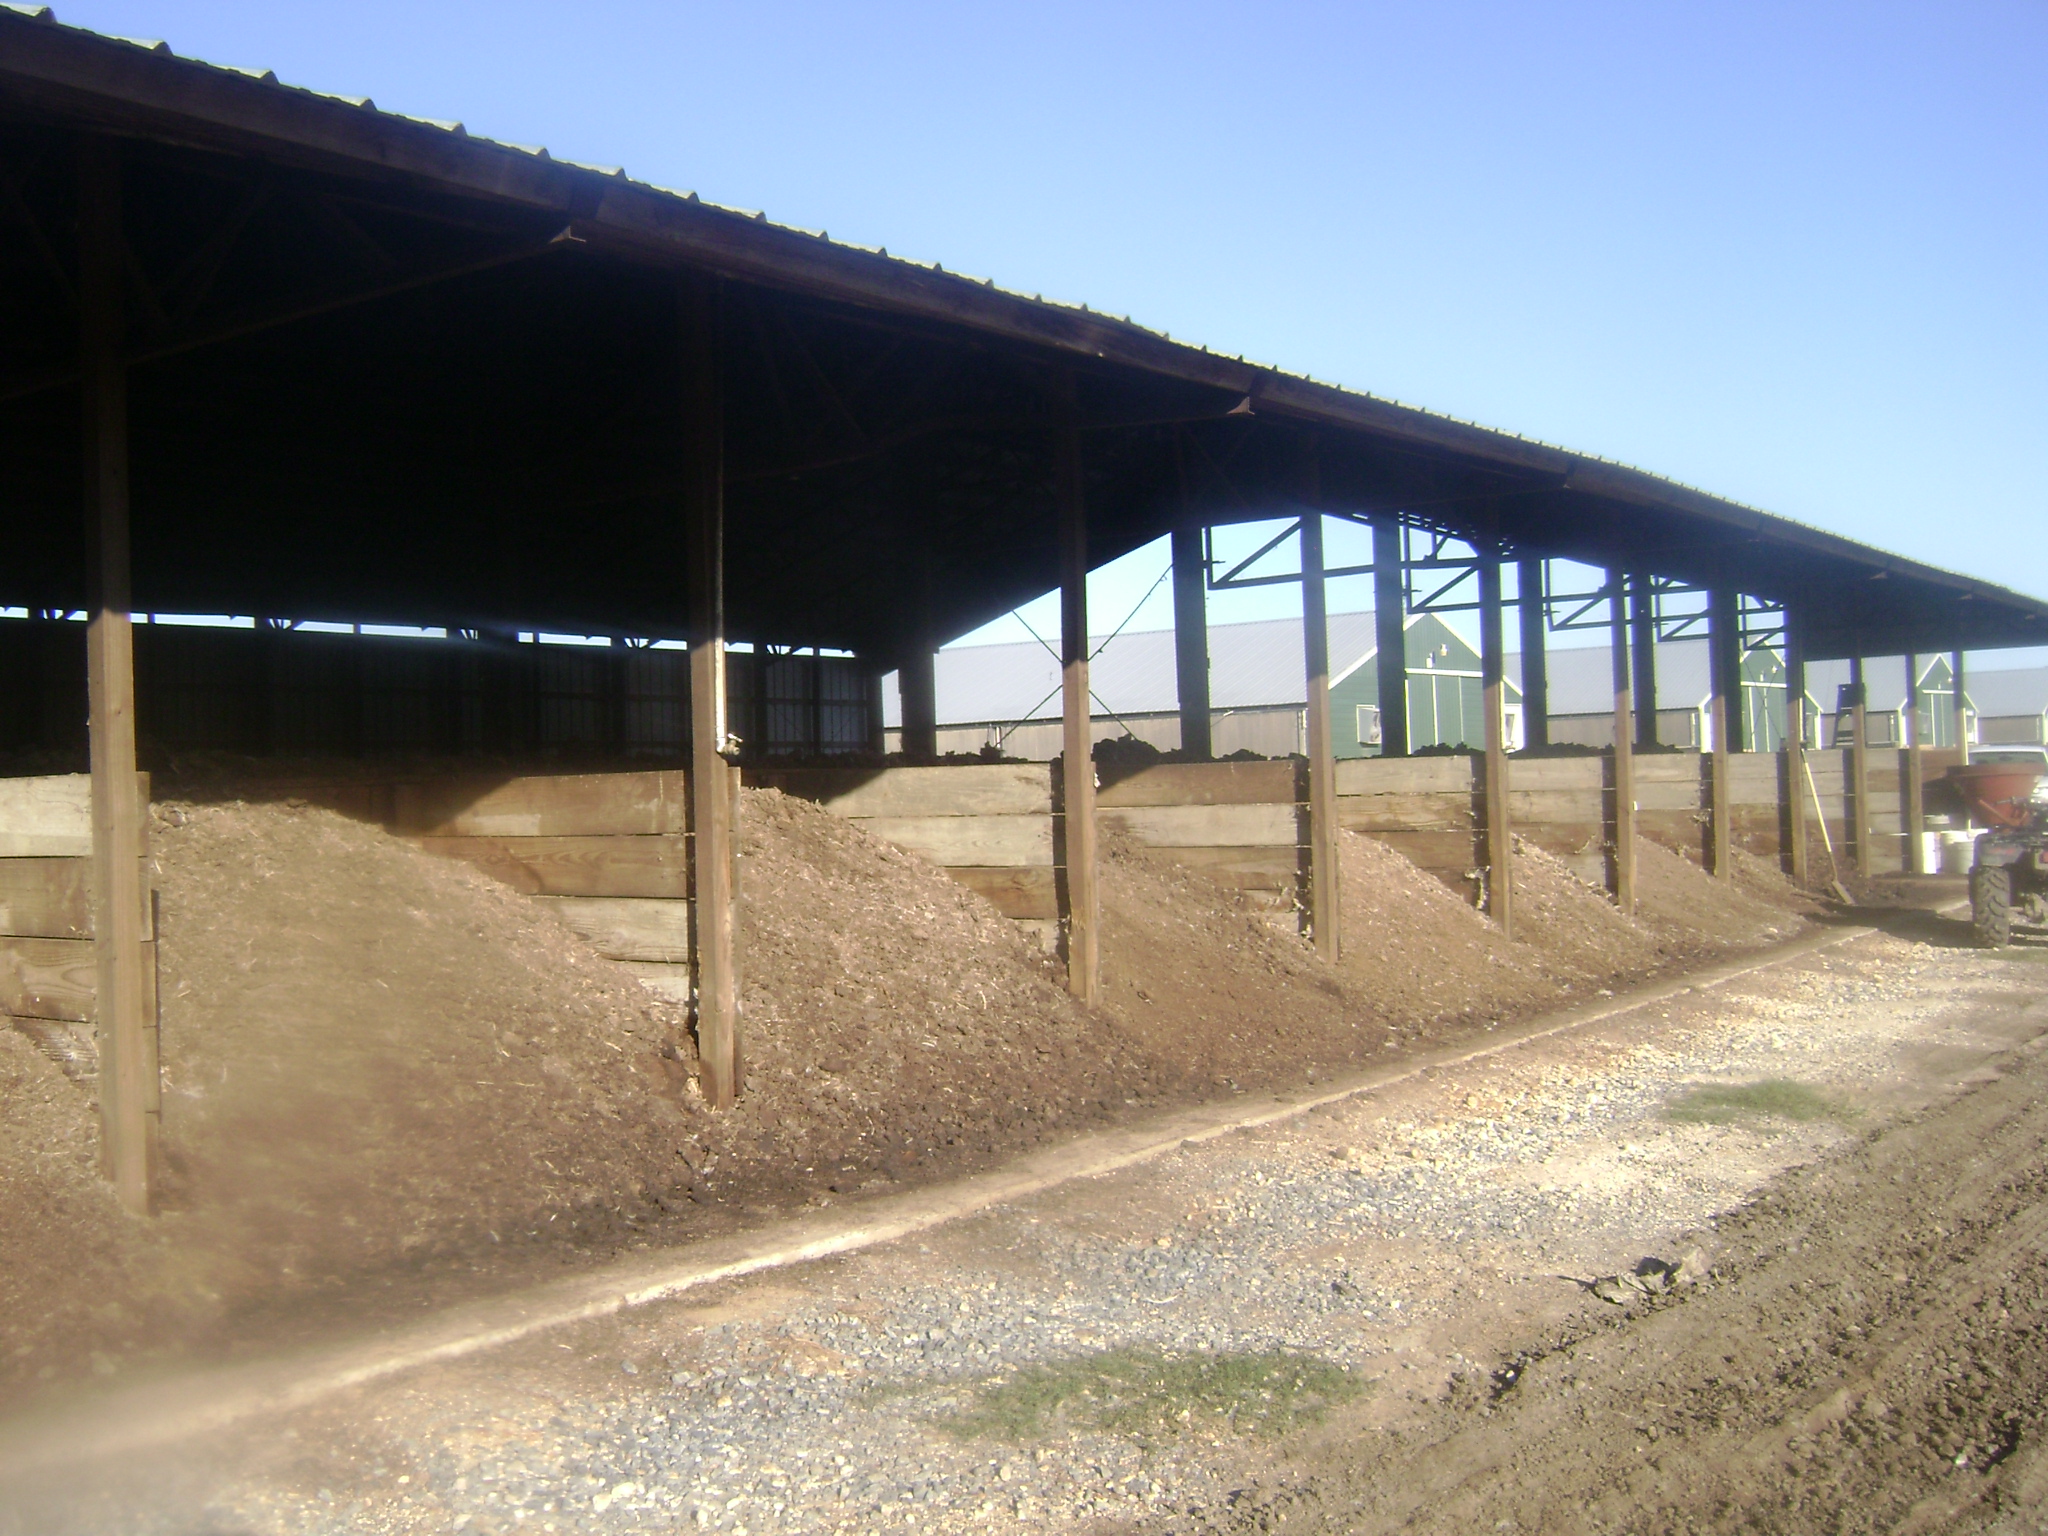
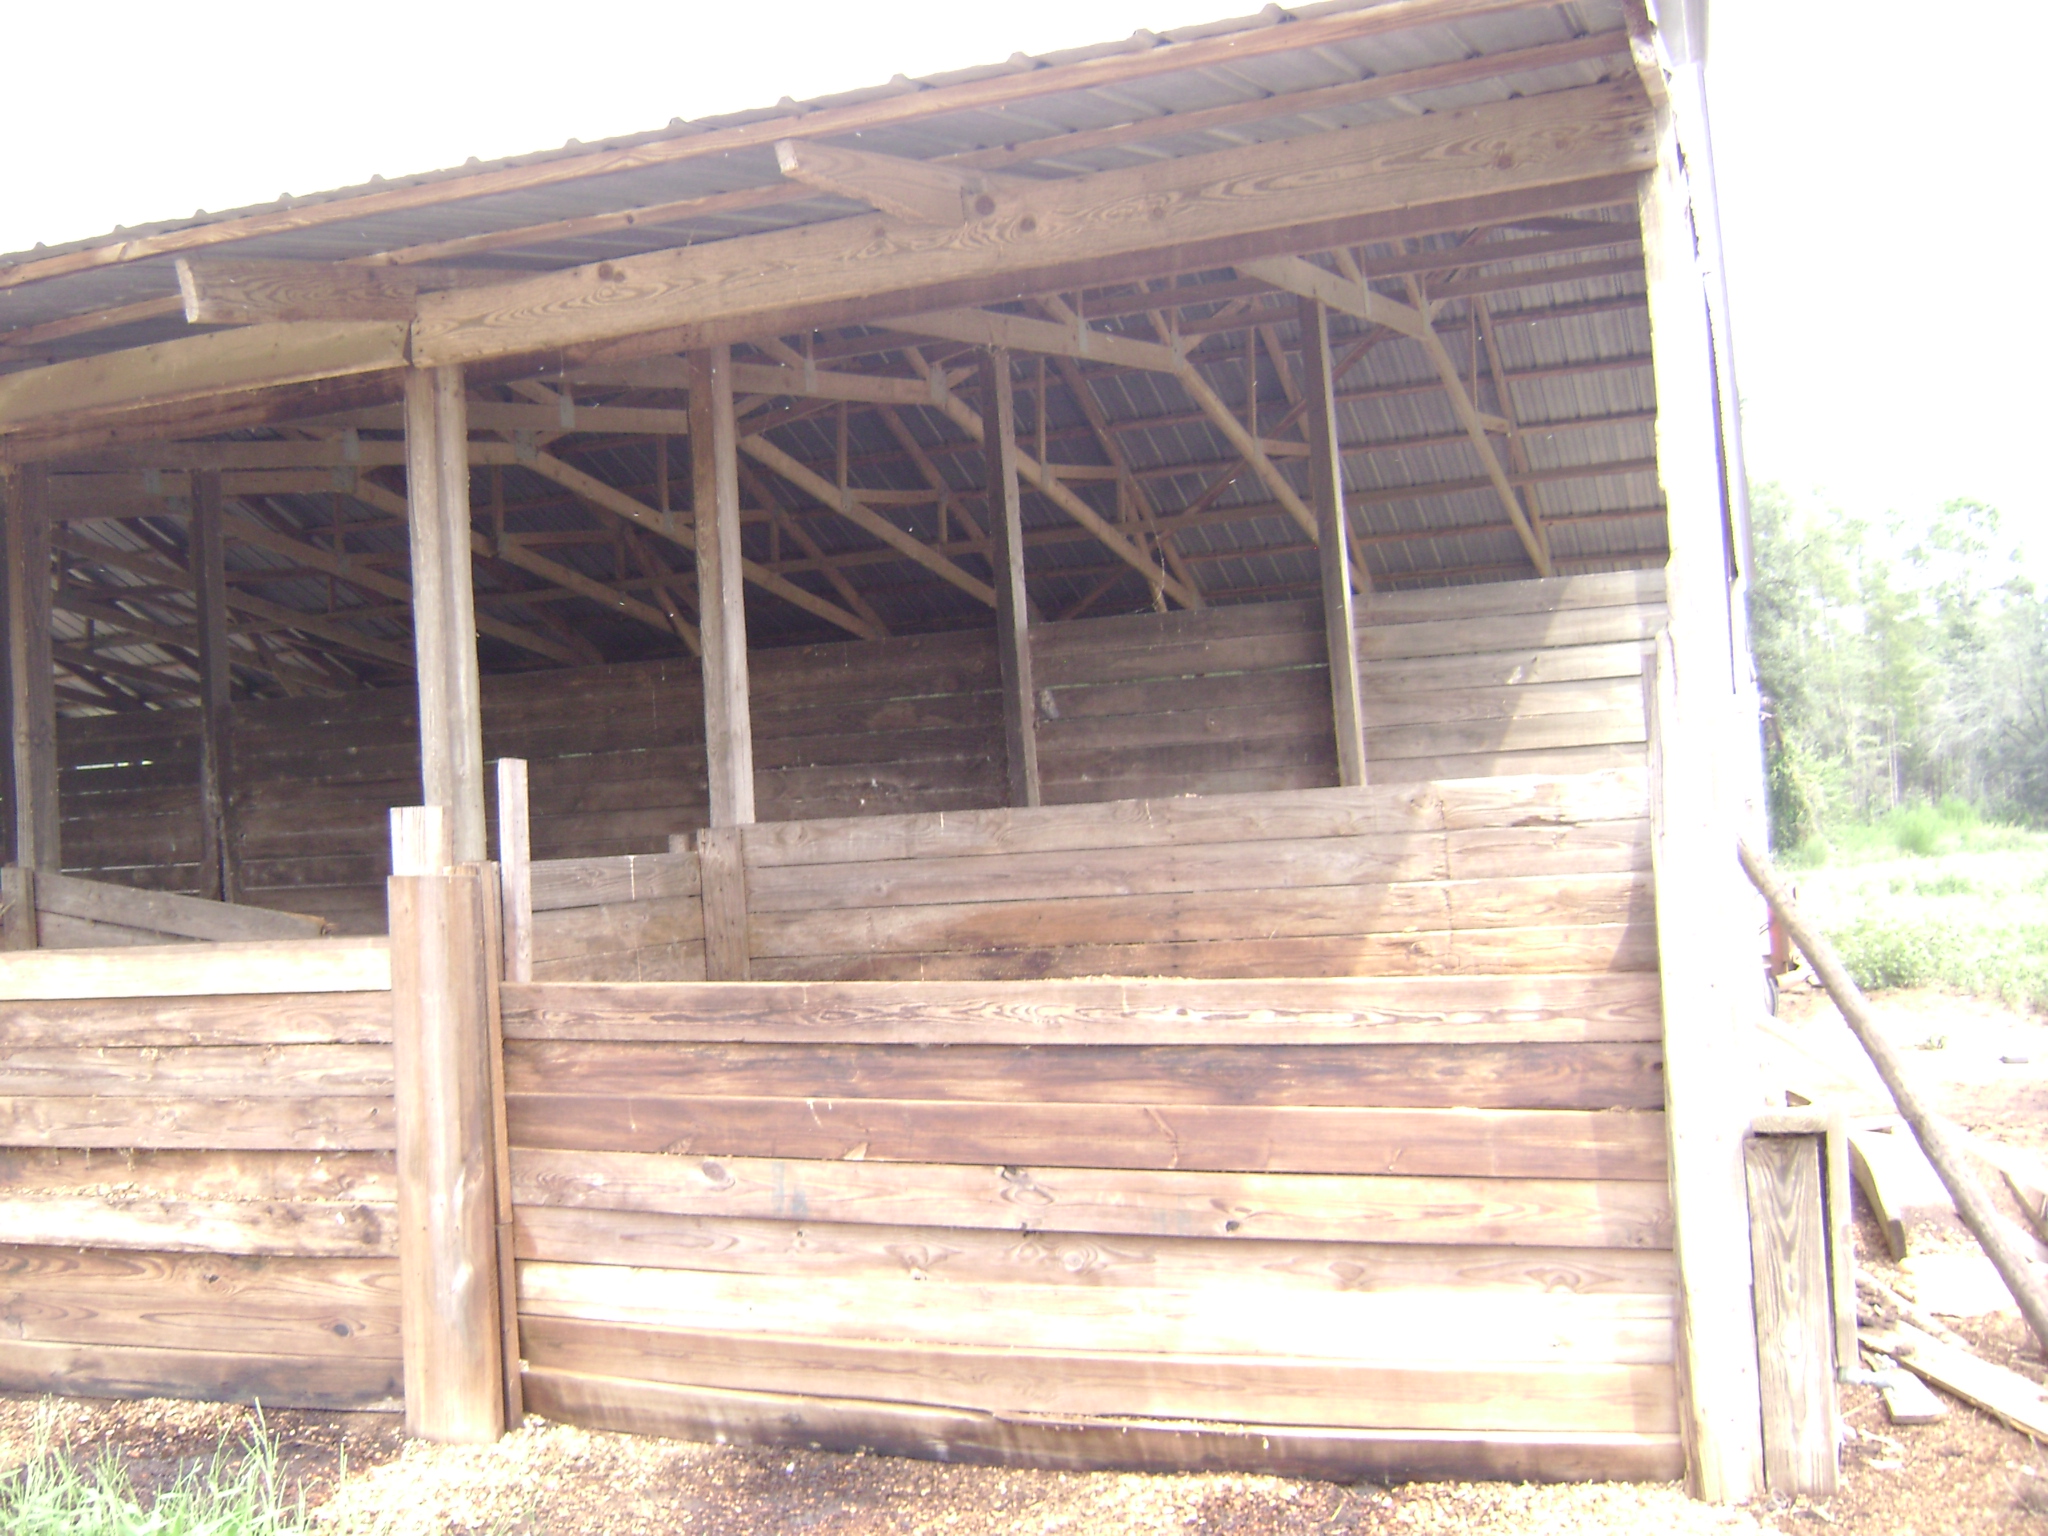
- Ensure that your compost bin structure has the following characteristics:
- Roof
- Concrete floor
- Primary bins enclosed on three sides
- Front wide enough to allow for a front-end loader
- Space for secondary composting and material storage
- A front-end loader or skid loader for bin loading and unloading. Shovels, hay forks and wheelbarrows can also be useful.
- A long-stemmed thermometer for checking temperatures at different points in the pile.
- Water hoses for adding water to the bins if necessary.
- A carbon-based material (supplied by the litter).
- Nitrogen (supplied by the dead birds).
Layering the Bin

- Place an initial layer of litter 8 to 12 inches deep on the concrete floor. Optional: To get a jumpstart on the heat, add a little water to the litter that will be used to cover the dead birds on the following day. This will make the litter hot when it is applied to the dead birds.
-
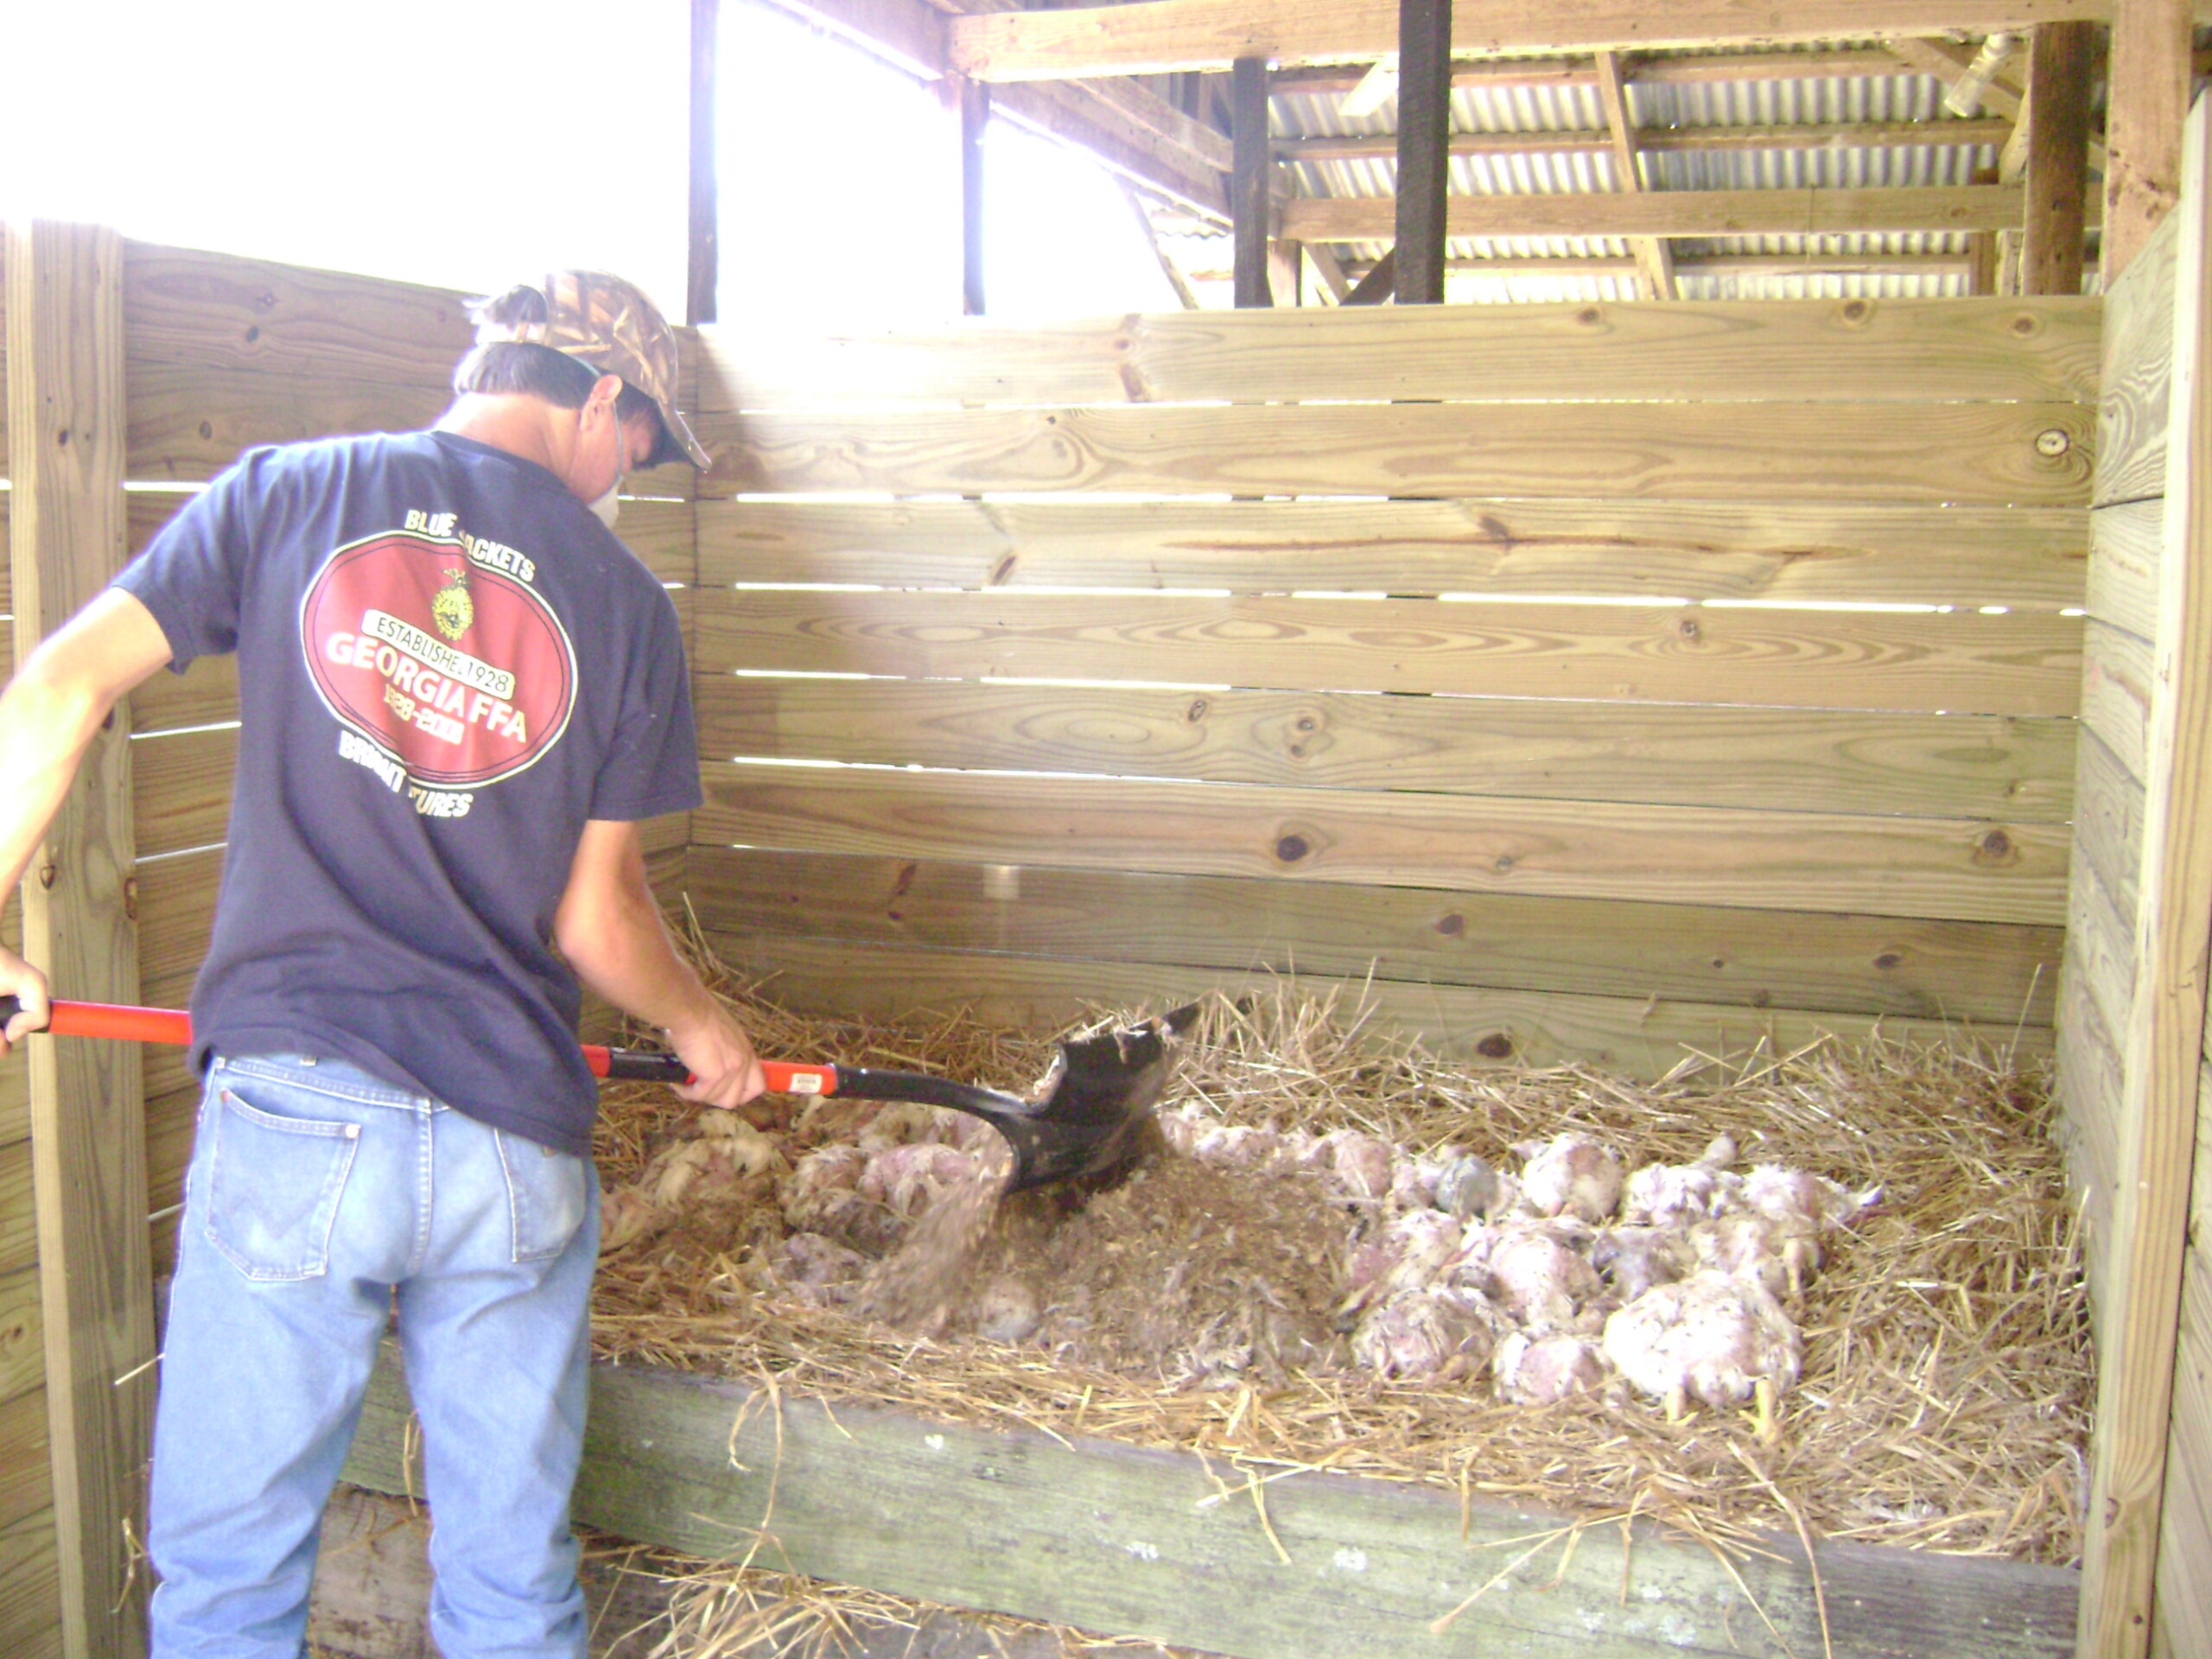
Add bird carcasses in a single layer, side by side and touching but not on top of each other (placing them on top of each other will slow down the deterioration process).
- Place carcasses 6 to 10 inches from the walls. (Placing carcasses too close to the wall can encourage pest infestation, reduce carbon coverage and reduce the overall heat because the wall acts as a heat sink).
- A small amount of water may be needed after each carcass layer to ensure 40 to 60 percent moisture content. Thoroughly wetting the carcasses will be sufficient.
-

Add a 6- to 8-inch deep layer of litter.
- Repeat steps 2-5 until the pile reaches a height of about 5 feet.
- A final layer of litter 8 to 10 inches deep will help to eliminate odors and prevent flies and scavengers from invading the compost pile.
Primary Phase vs. Secondary Phase
- The compost process takes place in two phases: the primary phase and secondary phase. Each phase is completed in a separate bin. Typically, there is one secondary bin and several primary bins.
- The primary phase is marked by increased temperature, soft tissue decomposition and softening of the bones.
- The end of the primary phase is marked by the pile temperature falling to below 130°F.
- After the primary phase is complete, the pile is turned into the secondary bin.
- During the secondary phase, also known as the maturation or curing phase, the compost is aerated and the remaining materials (mainly bones) continue to decompose until the material ultimately turns into a dark brown to black soil or humus.
- The end of the secondary phase is marked by the internal pile temperature remaining at or around 77 to 86°F and lack of an unpleasant odor.
Monitoring the Bin

- An efficient compost bin must be monitored frequently, especially during the primary phase.
- Temperature, moisture and time are all essential elements to managing a compost bin.
- Temperature is especially critical during the primary phase, when it should rise quickly to approximately 140°F within five days and remain there for seven to 21 days.
- Moisture content in the pile should be between 40 and 60 percent. When squeezed into a ball, compost with the correct moisture content will hold its shape and will not drip water.
 Too wet
 Just right!
- Excess moisture will result in a cold pile, reduced oxygen content, retardation of beneficial microbial activity and unpleasant odors.
- Too little moisture will prevent the pile from heating up and delay the decomposition process.
- The amount of time required to complete the composting process depends on:
- Environmental and internal pile temperatures
- Ingredient formulation
- Carcass size and weight
- Pile management
Troubleshooting
| Problem | Solution |
| Low temperature | |
| Possible Reasons: | |
| Too dry | Add water |
| Too wet (leaching) | Turn pile and add more carbon material |
| Failure to decompose | |
| Possible Reasons: | |
| Improper C:N ratio | Add more or less carbon as needed |
Carcasses layered too thickly
 |
Place carcasses in a single layer |
| Carcasses touching outside walls | Maintain carcasses 6 to 10 inches from walls |
| Foul Odor | |
| Possible Reasons: | |
Too wet (leaching)
 |
Turn pile and add more carbon material |
| Improper C:N ratio | Add more carbon as needed |
| Inadequate cover over carcasses | Cap off the top of the pile with 8 to 10 inches of bulking material |
| Flies | |
| Possible Reasons: | |
| Inadequate cover over carcasses | Cap off the top of the pile with 8 to 10 inches of bulking material |
| Too wet (leaching) | Turn pile and add more carbon material |
| Failure to reach proper temperature | Assess the C:N ratio and layering technique |
| Scavenging animals | Cap off the top of the pile with 8 to 10 inches of bulking material |
| Prevent initial entry with fence or barrier | |